Difference between revisions of "Inserting images"
(→Making an image link to another page) |
(→Making an image non-clickable) |
||
| Line 223: | Line 223: | ||
<pre>http://www.adciv.org/upload/thumb/4/41/Solar_sail.jpg/150px-Solar_sail.jpg</pre> | <pre>http://www.adciv.org/upload/thumb/4/41/Solar_sail.jpg/150px-Solar_sail.jpg</pre> | ||
| − | + | would be made to read: | |
<pre>{{SERVER}}/upload/thumb/4/41/Solar_sail.jpg/150px-Solar_sail.jpg</nowiki></pre> | <pre>{{SERVER}}/upload/thumb/4/41/Solar_sail.jpg/150px-Solar_sail.jpg</nowiki></pre> | ||
Revision as of 20:49, 5 January 2006
Contents
Steps to upload an image to this website
- In the 'toolbox' pane on the left-hand side is the Upload file link (only visible if you are logged in as a user). Click the link and follow the on-screen instructions.
- Have a JPEG or PNG image file ready somewhere already suitably named. Use the JPEG format for photographic images and (if you have suitable conversion software) use the PNG format for diagramatic images or images with large blocks of solid colour. If you have control over the compression ratio of JPEG images the recommended setting is 90% and level 9 with PNGs. Please don't upload vast high-resolution images unless necessary. Try to keep them under 1000 pixels high / wide.
- After the upload is complete you should see the image in the browser window - if you don't then there is likely to be a problem (although if you have clicked on the 'Upload new version of this file' link it doesn't give a preview), such as certain characters used in the title of the image that aren't compatible with this software. Use only alphanumeric characters for image names, don't even use '+' or '&'. When you upload a file you can make the title of the image different from the original filename of the image being uploaded by changing the text in the 'Destination filename' box. Note: please be descriptive when naming images. It is better to be too descriptive, than not descriptive enough.
- When you have successfully uploaded the image, and can see it in your browser, cut and paste the title at the top of the page, including 'Image:' text a the beginning.
- Go to (or create) the page where you want the image to appear, click edit at the top of the page and paste the image title. Then surround the whole title (again including the 'Image:' text with [[double square brackets]]. If you do nothing else and save the page you will find you have embedded the image at its full resolution which may make appear too large to see in the browser. For further options, see below.
Image display options
This code:
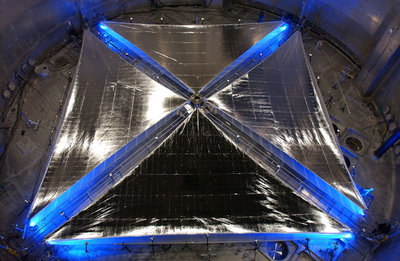
[[Image:Solar sail.jpg|thumb|400px|left|Solar sail]]
Produces this:
- Image:Solar sail.jpg is the name of the image to show
- thumb puts the image in a frame (if no size is specified then it is shrunk to 180 pixels wide)
- 400px specifies the width of image in pixels to scale it to
- left means align the image on the left-hand side
- Solar sail is the image label that appears at the bottom of the frame
Other options
- Removing thumb just shows the raw image at it's native resolution with no frame. Although if combined with option below, then can control size. With no frame the descriptive text is only shown on mouse-over.
- Using frame instead of thumb allows the image to be show at it's native resolution, but with the 'thumb'-type frame and text underneath
Behaviour of text next to images
Text following an image is shown along-side the image by default
[[Image:Solar sail.jpg|left|400px|Solar sail]]
This text appears to the right

Abc abc abc abc abc abc abc abc

123 123 123 123 123 123 123 123 123

Abc abc abc abc abc abc abc abc

123 123 123 123 123 123 123 123 123
Produces:
This text appears to the right
Abc abc abc abc abc abc abc abc
123 123 123 123 123 123 123 123 123
Abc abc abc abc abc abc abc abc
123 123 123 123 123 123 123 123 123
Making text follow on under the image rather than to the side
- To enable this either add none as a positioning option for the image or put <br style="clear:both;" /> <!-- This code makes sure following text appears below the last image--> after the image, before any following text.
[[Image:Solar sail.jpg|none|400px|Solar sail]]
<br style="clear:both;" /> <!-- the br tag makes sure following text appears below the last image -->
This text follows on underneath the previous image

Abc abc abc abc abc abc abc abc

123 123 123 123 123 123 123 123 123

Abc abc abc abc abc abc abc abc

123 123 123 123 123 123 123 123 123
Produces:
This text follows on underneath the previous image
Abc abc abc abc abc abc abc abc
123 123 123 123 123 123 123 123 123
Abc abc abc abc abc abc abc abc
123 123 123 123 123 123 123 123 123
Multiple images will butt up side by side if no position label is used
- Although they will 'wrap' to the next line based on the size of the browser window.
[[Image:Solar sail.jpg|250px|Solar sail]]
[[Image:Solar sail.jpg|250px|Solar sail]]
[[Image:Solar sail.jpg|250px|Solar sail]]
Produces:
Creating a table or grid of images
- To create a fixed grid that doesn't wrap and give you control of the layout interms of clumns and rows, use this format:
{|
|[[Image:Solar sail.jpg|150px|Solar sail]]
|[[Image:Solar sail.jpg|150px|Solar sail]]
|[[Image:Solar sail.jpg|150px|Solar sail]]
|[[Image:Solar sail.jpg|150px|Solar sail]]
|-
|[[Image:Solar sail.jpg|150px|Solar sail]]
|[[Image:Solar sail.jpg|150px|Solar sail]]
|[[Image:Solar sail.jpg|150px|Solar sail]]
|[[Image:Solar sail.jpg|150px|Solar sail]]
|-
|[[Image:Solar sail.jpg|150px|Solar sail]]
|[[Image:Solar sail.jpg|150px|Solar sail]]
|[[Image:Solar sail.jpg|150px|Solar sail]]
|[[Image:Solar sail.jpg|150px|Solar sail]]
|-
|}
Produces:

|

|

|

| |||

|

|

|

| |||

|

|

|

|
For a speedy method with less control you can use the gallery function to produce a quick grid with images thumbnailed at a fixed size:
<gallery>
Image:Solar sail.jpg
Image:Solar sail.jpg|Captions can be added
Image:Solar sail.jpg
Image:Solar sail.jpg
Image:Solar sail.jpg
Image:Solar sail.jpg
Image:Solar sail.jpg
Image:Solar sail.jpg
</gallery>
Produces:
Changing the default behaviour of images
Clicking an image normally takes you to the image's page where you can see a full-resolution version and any information on that image.
Making an image link to another page
This was not designed into this wiki software, but it can be done by using the following code:
<div class="plainlinks">[{{SERVER}}{{localurl:NAME OF TARGET PAGE}} {{SERVER}}/PATH OF IMAGE]</div>
See the last paragraph in the section below on how to find the correct path for an image.
Example:
Making an image non-clickable
You might want this behaviour so you can embed images in text without it becoming a clickable object (which happens automatically) that may confuse the reader in that instance. Generally it is not necessary to use this.
Insert the bare web address of the image in question. It could be an image residing on the internet, or it could be hosted on this website's server. To use an image from this website, first display it using the normal method scaled to the size you want (see Image display options).
Then right click on the image and select 'properties' to get its full path. Now paste it into your text on the page where you want it. Make the images path 'portable' (necessary to allowing easiy transfer of data to another server) by replacing the initial part of the path 'http://www.adciv.org' with '{{SERVER}}'.
So for example:
http://www.adciv.org/upload/thumb/4/41/Solar_sail.jpg/150px-Solar_sail.jpg
would be made to read:
{{SERVER}}/upload/thumb/4/41/Solar_sail.jpg/150px-Solar_sail.jpg</nowiki>
Which displays as:
http://adciv.org/upload/thumb/4/41/Solar_sail.jpg/150px-Solar_sail.jpg


